


15 key things to do after installation of WordPress – I hope you have already installed WordPress as per the previous post – How to make WordPress Blog? Once you have installed WordPress, you have to make some necessary settings to enhance your website efficiency, performance, and security.

Here is a list of important things you need to do after installation of WordPress.
15 Key Things to do after installation of WordPress
#1 Remove Default Dummy Content
The first thing you need to do is to remove default dummy content. A page called a sample page and post Hello world is added. It is highly recommended that you should remove these dummy content. To remove this content, you need to visit the respective section and select the option “Move to Trash”.
#2 Configure Permalinks
The second important step is the configuration of Permalinks. You need to go to Setting >> Permalinks from the dashboard to configure the Permalinks.
The default permalinks would be – http://yourwebsite.com/?p=123
The default WordPress permalinks are not SEO friendly. So, change it to Post name or Custom Structure.
I would recommend %postname% as it is SEO friendly.
#3 Change Site Title, Tagline and Time zone
The next step is setting Site Title, Tagline and Time Zone. You need to visit “Setting >> General” section. Here you will find Site Title, Tag line and Tim e Zone settings. You need to set suitable Site Title and tagline.
The site title and tagline will be visible to the website visitors.
#4 Enable Disable User Registration
Enable or disable user registration is an essential step. If this option is enabled it allows visitors to register on your website or blog. He/she will be given a default role. To enable or disable user registration you need to click on “Setting >> General” from the dashboard.
You will be able to see membership rule If it is tick marked anyone can register on your website. He/she will be given the default role specified by you. This option helps if you want other people to contribute to your website via guest post or manage your blog.
The following rules can be assigned to the visitor.
Administrator – This role provides access to all admin features on the website.
Editor – Editor role will be able to create and manages posts. They can manage posts of another user as well.
Author – Authors can publish and manage their own posts only.
Contributor – Contributors can write and manage their own posts but they can’t publish them.
Subscriber – Subscribers can manage their profile only.
#5 WWW or non WWW preferred site configuration
WWW or non WWW settings are found in the “General” section only. Here you need to set your WordPress Address (URL) and site address. If you want to keep www version, you need to enter http://www.yoursite.com in case you want preferred version without WWW enter http://yoursite.com
#6 Reading setting configuration
You also need to configure reading section. In reading section under “Settings” you will find configuration related to your home page.
You can select specific page to be displayed as home page. Alternatively, you can also select your latest post list as home page. In case you select latest post, you need to select number of post to be shown on home page.
#7 Install Theme
Now it is time to select your theme. Under Appearance section you will find Theme section. Here you need to select theme. You can press “Add New Theme”. You will be taken to theme install page where you will find number of free themes.
You can search via keyword if theme name is known to you. Once your theme is installed you need to configure it. If you don’t like free themes, you can go for premium themes.
#8 Secure your Website
Securing your website is very important. Website is always prone to attacks by hackers. I recommend taking following steps to secure your website.
- Change your auth key. You will find auth key in wp-config.php file. This file is stored at root level.
- Make sure to change table prefix of WordPress. Default table prefix value is “wp_”. To change table prefix you need to open wp-config.php file and replace prefix value. Prefix value is identified in the line $table_prefix = ‘wp_’. Once you change prefix in configuration file make changes in the database. For making change in database use either SQL query or select all tables and click on Replace table prefix.
- Next step is to change admin panel URL. By default, you can access admin panel by going to http://yoursite.com/wp-admin URL. You need to change it via installing WPS Hide Login Plugin.
- Change administrator password. If you have keep very easy password for login to your site, it is recommended to change it.
- Install Wordfence Plugin and configure it for login security and other security options. You can configure two factor authentication if required.
#9 Improve Page Loading Speed
Improving page loading speed is next important things you need to after installation of WordPress. There are multiple ways to improve your page loading speed. Few of them are given below.
- Minify and combine JS and CSS file. Reduce image size.
- Remove and deactivate unused plugins.
- Make use of content delivery network (CDN).
- Use Caching plugins such as W3 Total Cache or WP Rocket.
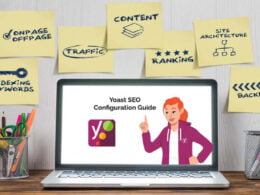
#10 Install and Configure SEO Plugin
Now it is time to install and configure SEO plugin. SEO plugin is important for improving your website ranking. You can set description, tag and other SEO features via SEO plugins. You can either use Rank Math or Yoast SEO plugin on your site.
#11 Configure Ping Listing or Update Service
Ping list is helpful in faster indexing of published post. In order to update ping list, visit Setting >> Writing section. Under Update services section enter following ping list.
- http://rpc.pingomatic.com/
- http://blogsearch.google.com/ping/RPC2
- http://api.feedster.com/ping
- http://api.moreover.com/RPC2
- http://api.moreover.com/ping
- http://api.my.yahoo.com/RPC2
- http://api.my.yahoo.com/rss/ping
#12 Setup Google Analytics
Google Analytics helps you to know statistic of your website. You will come to know about visitor count, bounce rate, time spent on the website, location and lot of other information. In order to setup Google Analytics you need to visit – https://www.google.co.in/analytics/ and generate analytics code.
#13 Media File Setting
Media File setting is next step. Here you need to visit Setting >> Media section and set thumbnail size, medium size and large size. This setting is important to increase speed of your website.
#14 User Profile Setting
User profile setting is important step. You can setup user profile setting by visiting User section. Here you need to configure details such as Fist Name, Last Name, Nickname, Email and Social media profile. You can also change password using this section.
#15 Social Presence
Once you are done with above steps you need to go for increasing your social presence. In order to do that you need to setup Facebook page, twitter handle and Pinterest login. Once your social profile is setup you can configure it in your WordPress.
I hope above steps will help you in completing your blog setup.